

General info
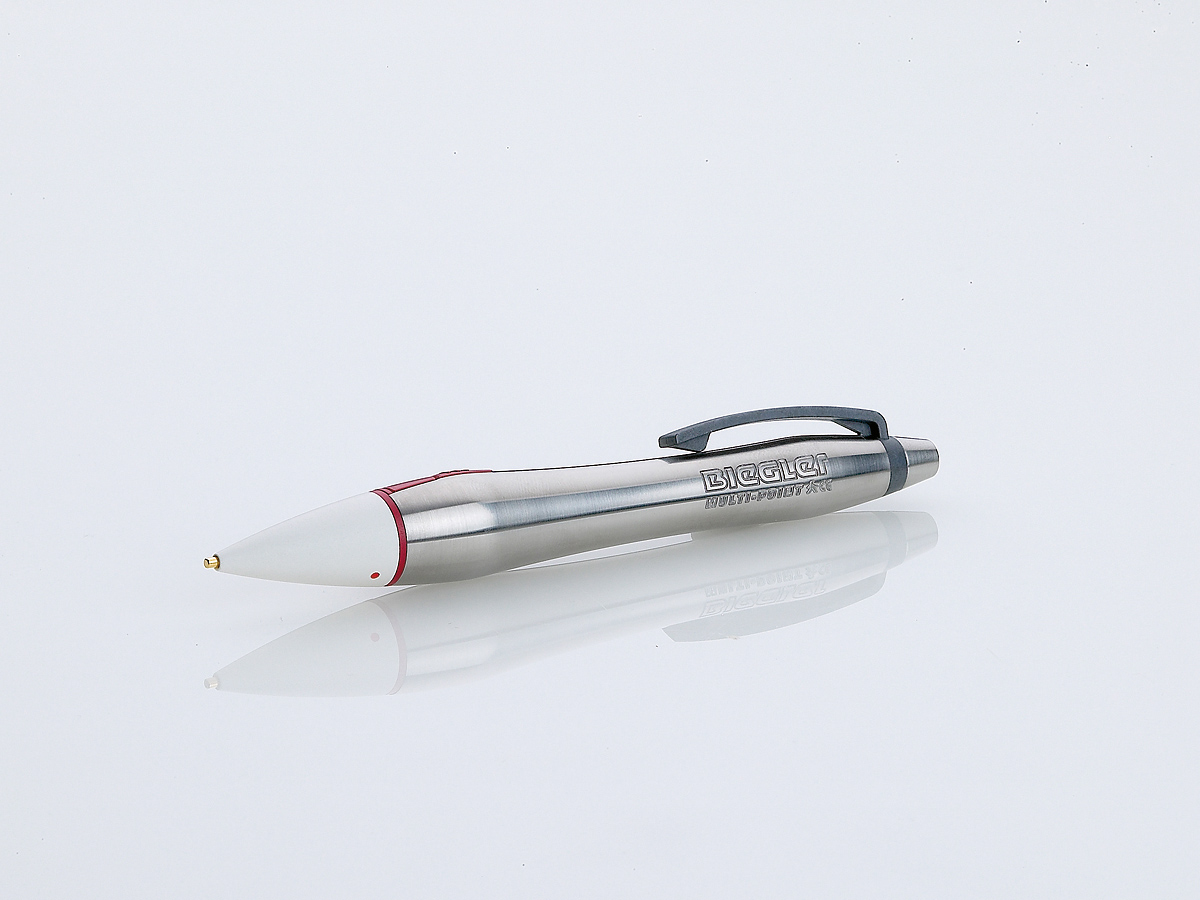
P-STIM™is a miniaturized battery operated device designed to administer auricular point stimulation treatmentover several days. P-STIM™ is placed behind the patient’s ear and connected to stimulation needles on the auricle. The advantage of using the ear for such treatment is that it offers numerous points for stimulation within a small area. The appliance transmits low-frequency electric pulses to exposed nerve-endings, which trigger the release of endorphins. The built-in microchip creates periods of stimulation and rest, each lasting approximately 3 hours.
Use, indications and treatment
Point stimulation by P-STIM™is mainly used to treat pain . Use of the device is recommended for pre-operative, intra-operative and post-operative pain therapy as well as for the treatment of chronic pain. P-STIM™ is non-drug treatment for pain and wound healing. At the same time, there would appear to be possibilities of using this device in the future in the treatment of addiction and allergy and in special fields of anaesthesia . It can be also used for treating gangrene.
Current clinical trials:
- Fibromyalgia
- Diabetes
- Blood pressure
- Anxiety and Depression
- Insomnia
- Allergies
- Increased cholesterol in the blood
- Slimming
- Crohn's disease
Patient’s quality of life
P-STIM™allows to perform continuous point stimulation over a period of several days and offers the patient a high degree of comfort and mobility . An advantage over drug therapy is that the patient no longer suffers any of the possible side-effects of pain-killers such as impaired reactions. In other words, the patient can continue to lead his life as usual, without loss of quality.
How will your pain patients benefit from The P-STIM™?
- The P-STIM™is minimally invasive and is applied in an economical time frame.
- The device is removed and disposed of by the patient after four days.
- It is light weight (7g), allowing a patient to enjoy normal daily activities without restrictions.
- An advantage over drug therapy is that the patient no longer suffers any of the possible side-effects of pain-killers such as impaired reactions. In most cases, the patient claims an improvement in overall clarity and quality of life .
- P-STIM™is generally well tolerated and can be combined with other forms of therapy.
- After the initial treatment, most patients describe a remarkable reduction in symptoms.
FAQ: How will my practice benefit?
Training and certification for PSTIM™ can be done in one business day. PSTIM™ has low start up and overhead costs, and is reimbursed by Medicare and most major medical plans.
Testimonials and External Links
Many people have benefited from the therapeutic effect of P-STIM™ and have shared their experience:
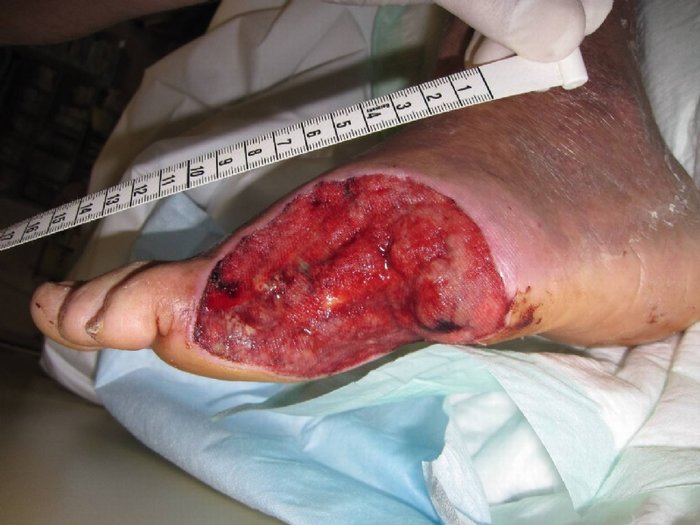
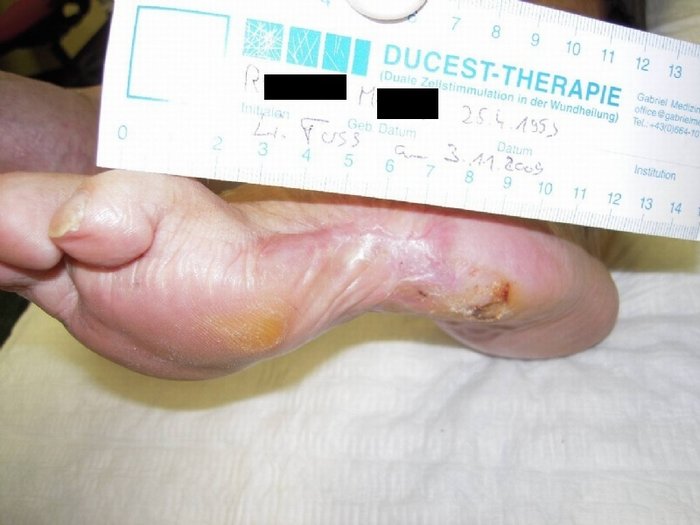
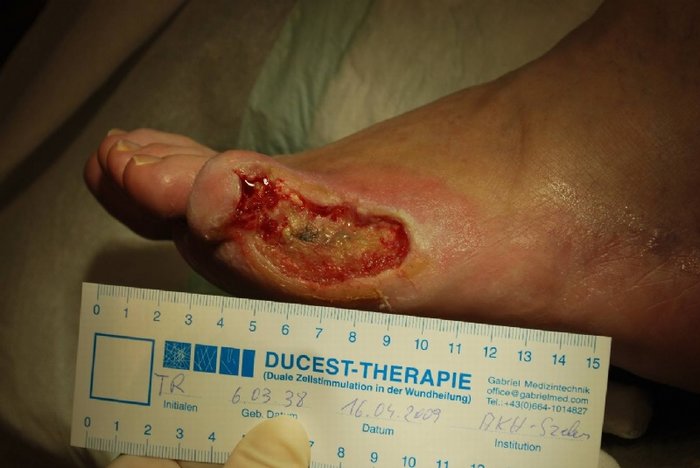
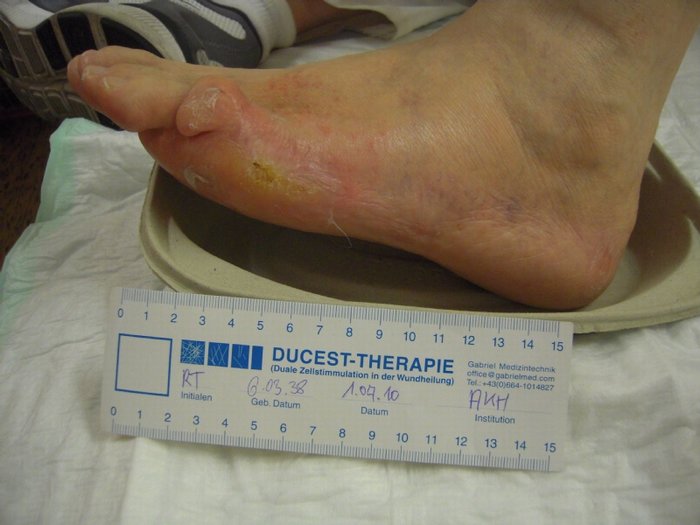
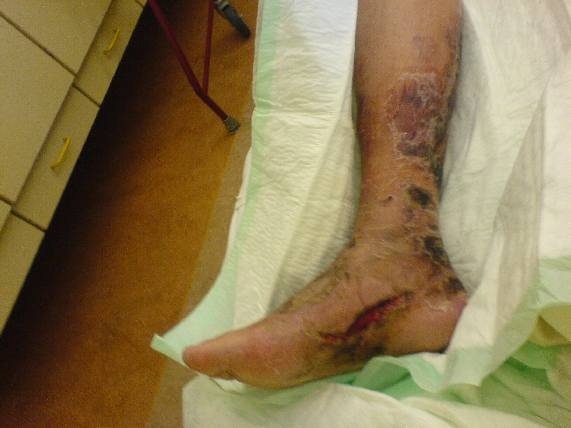
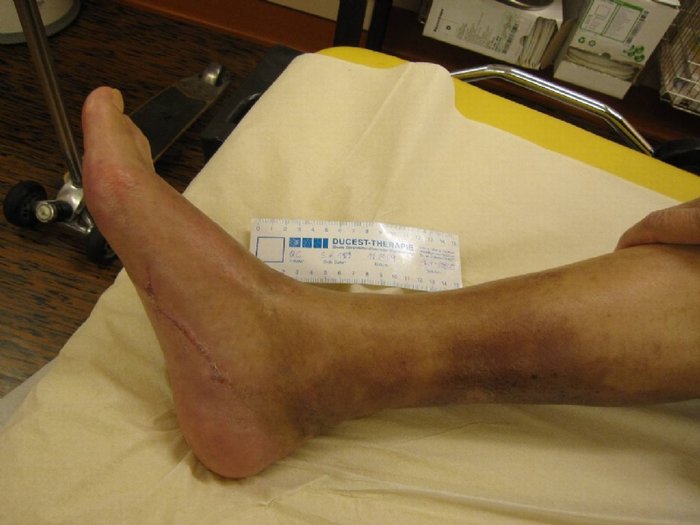
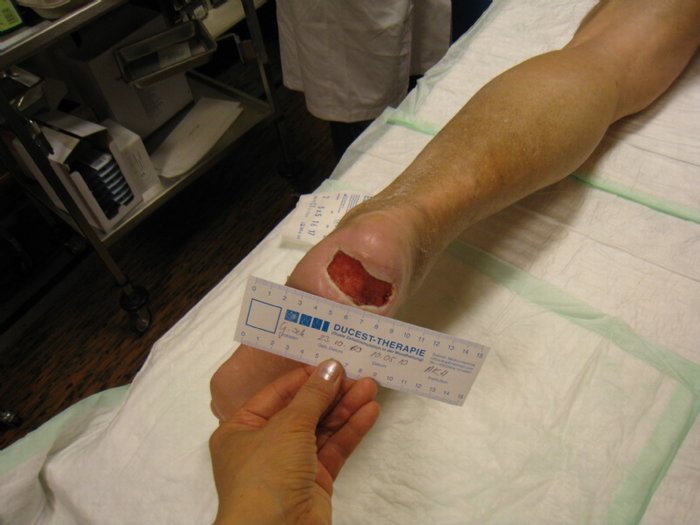
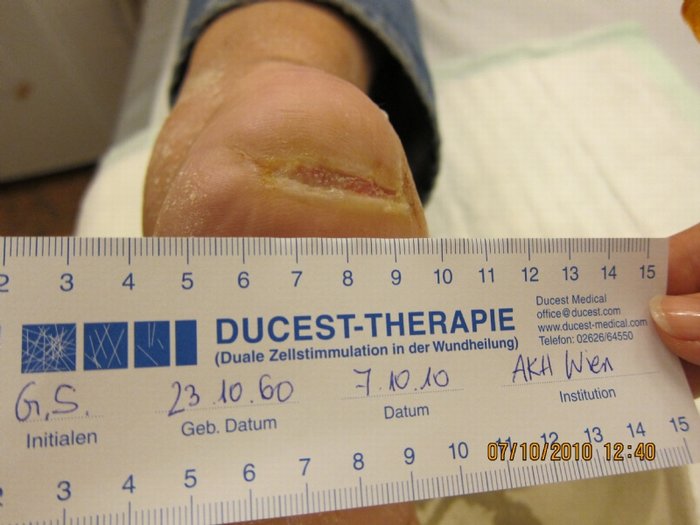
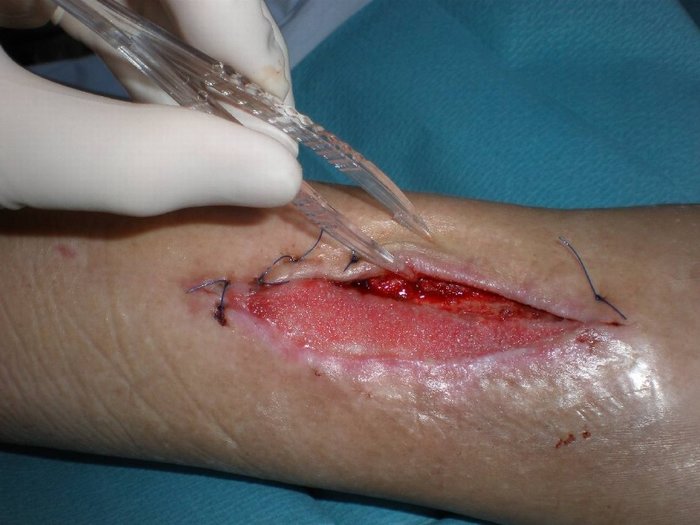
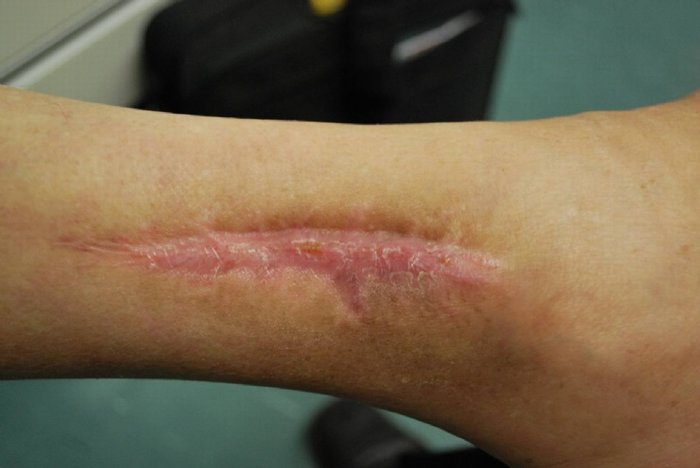
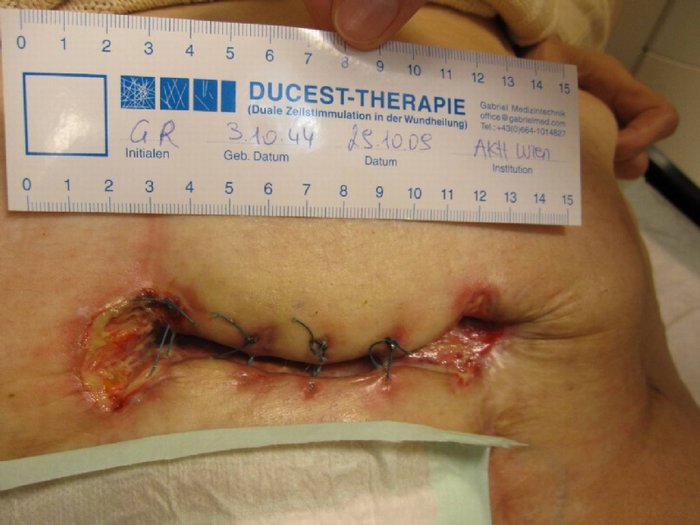
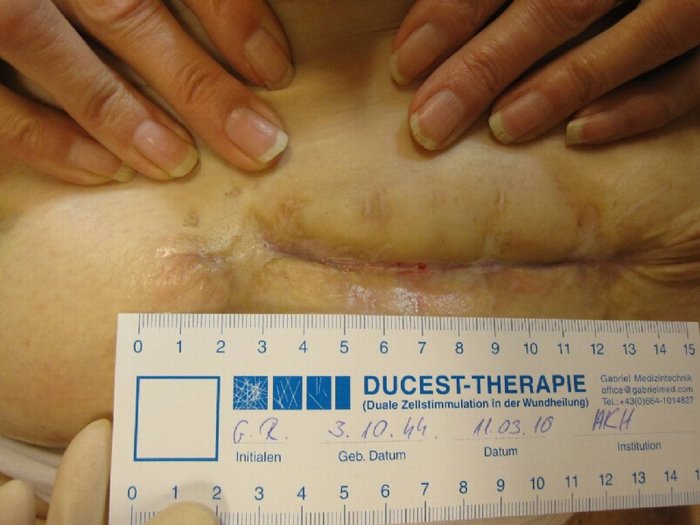
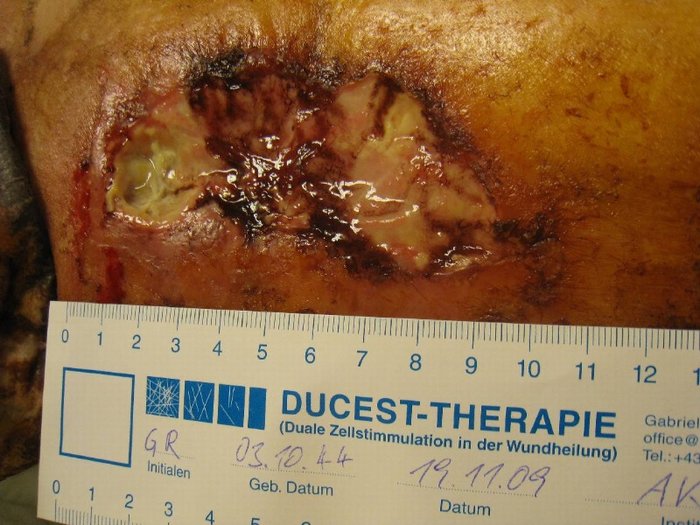
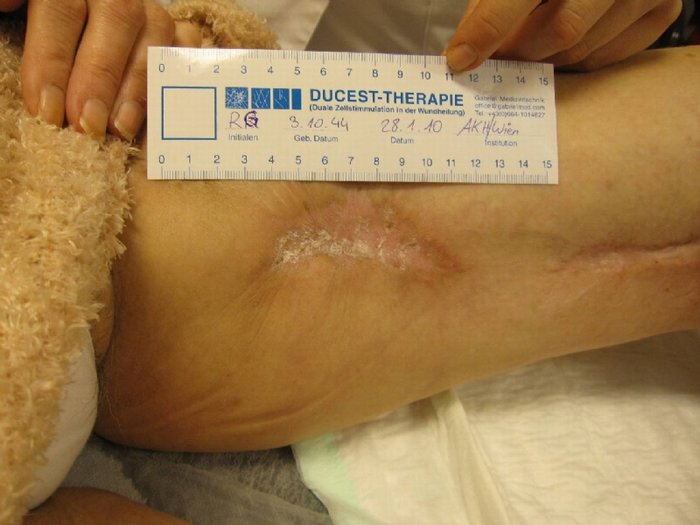
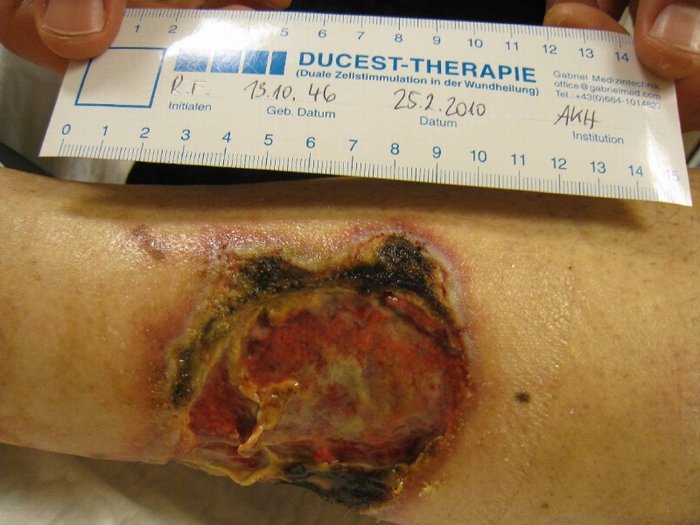
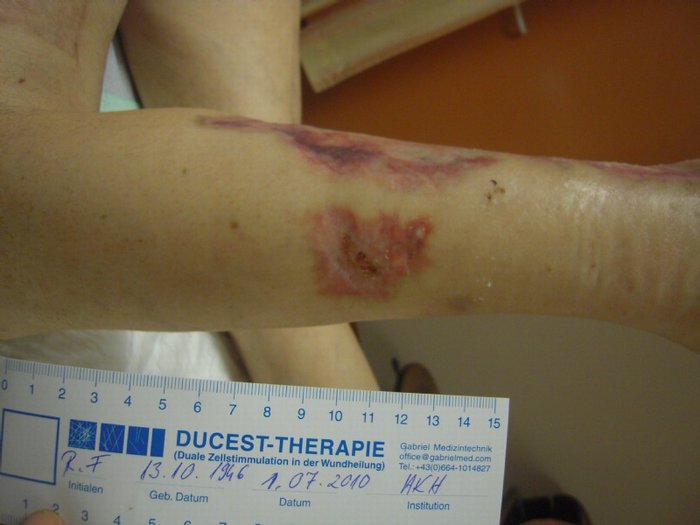
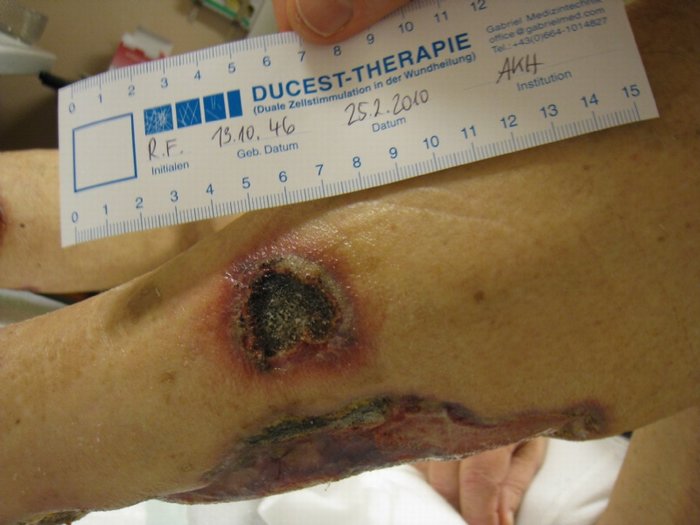
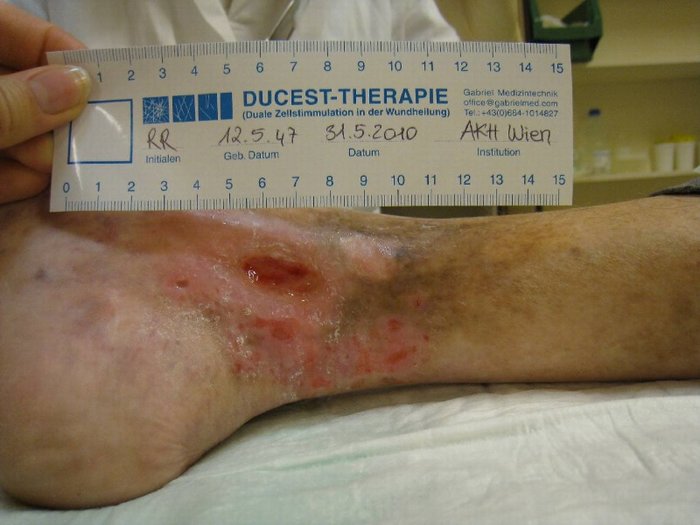
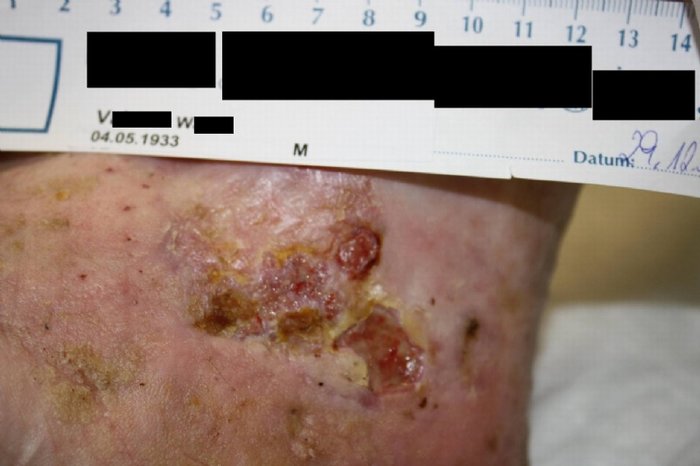
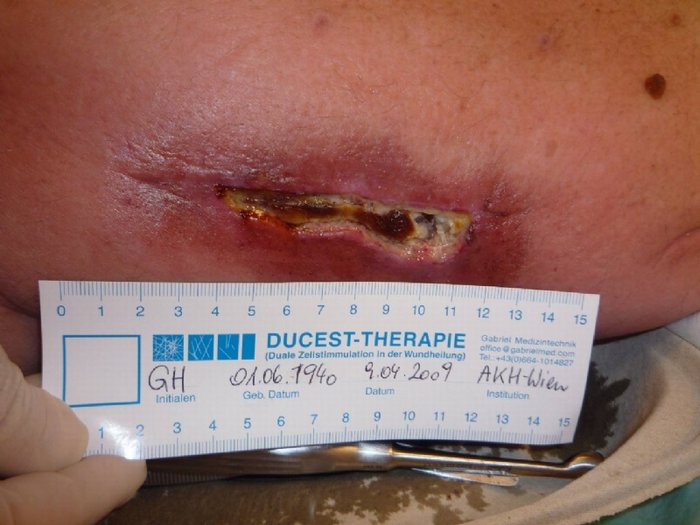
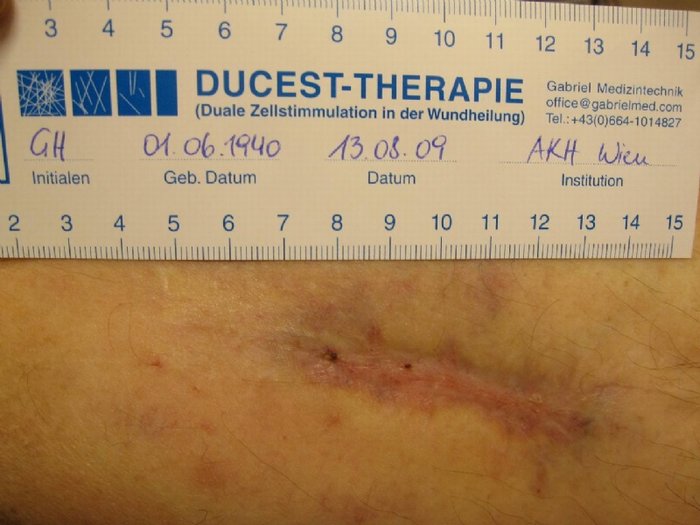
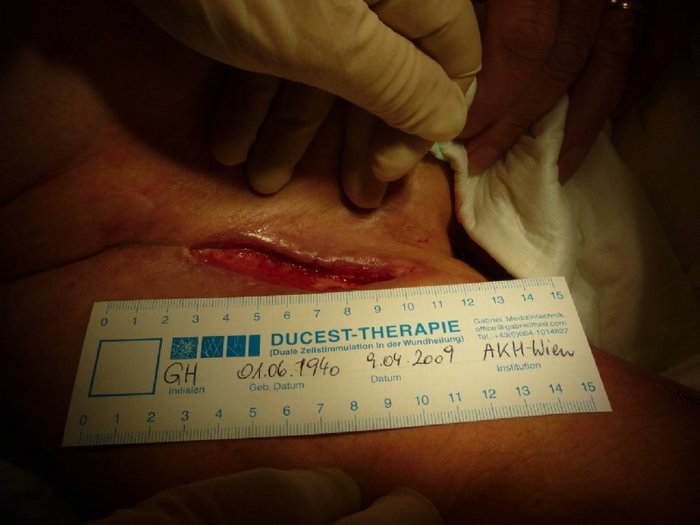
Wound Healing
Researches and Clinical studies
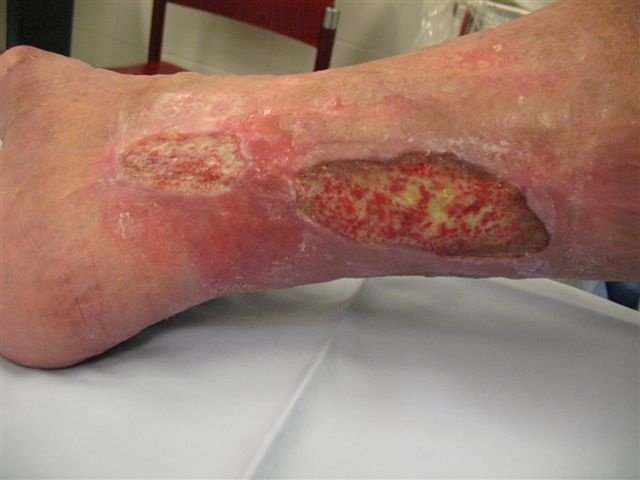
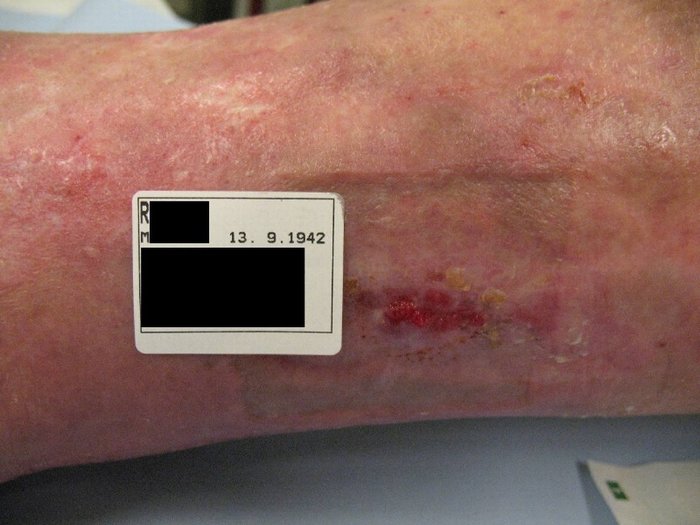
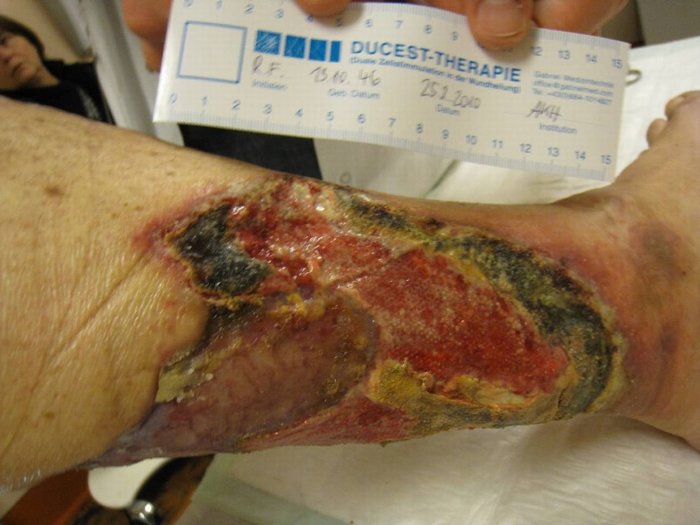
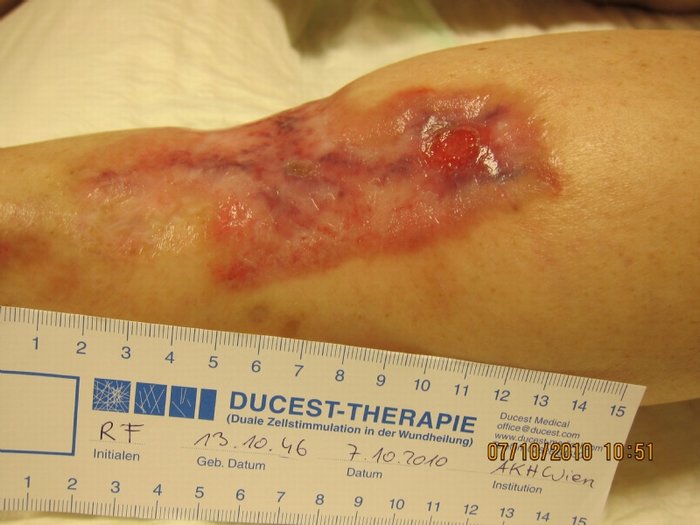
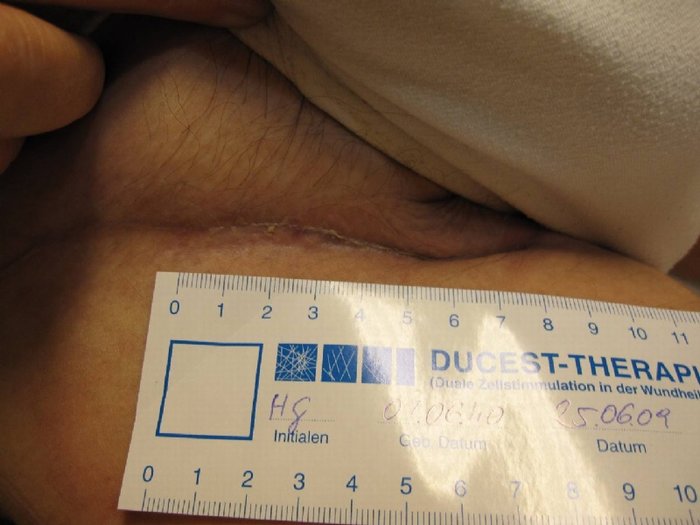
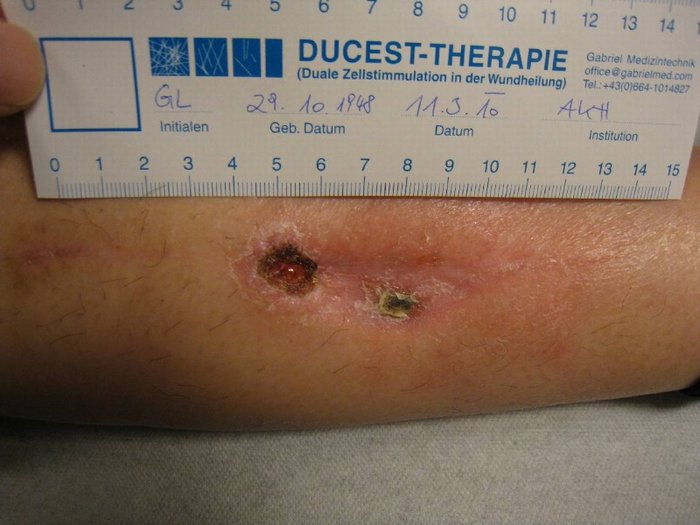
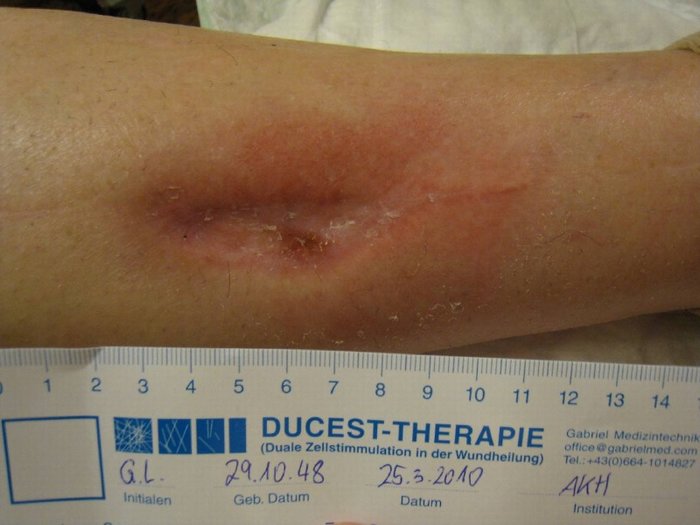
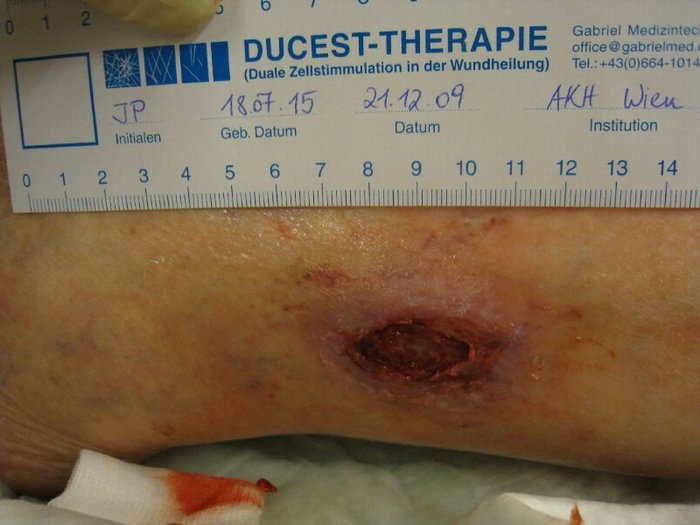
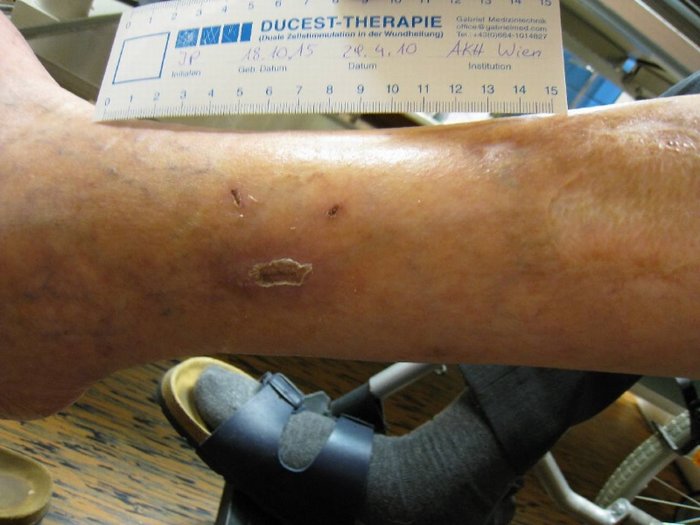
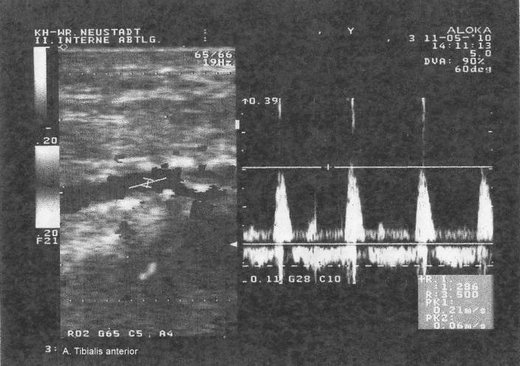
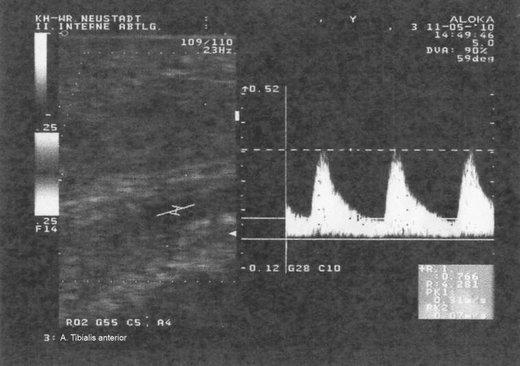
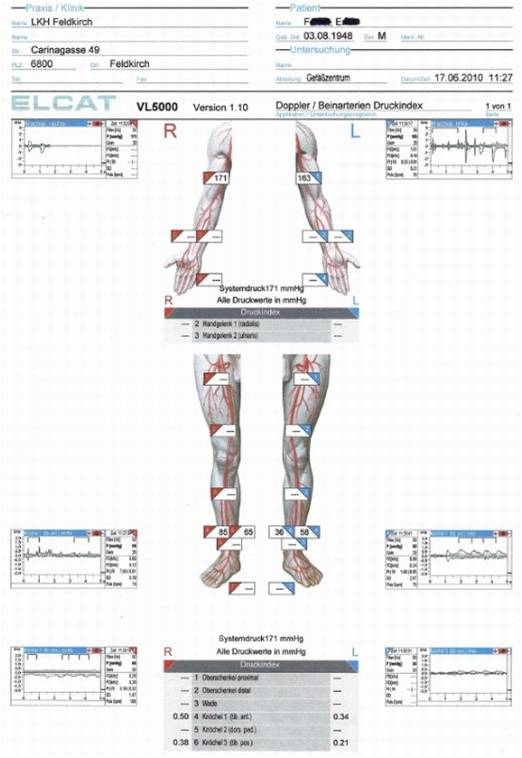
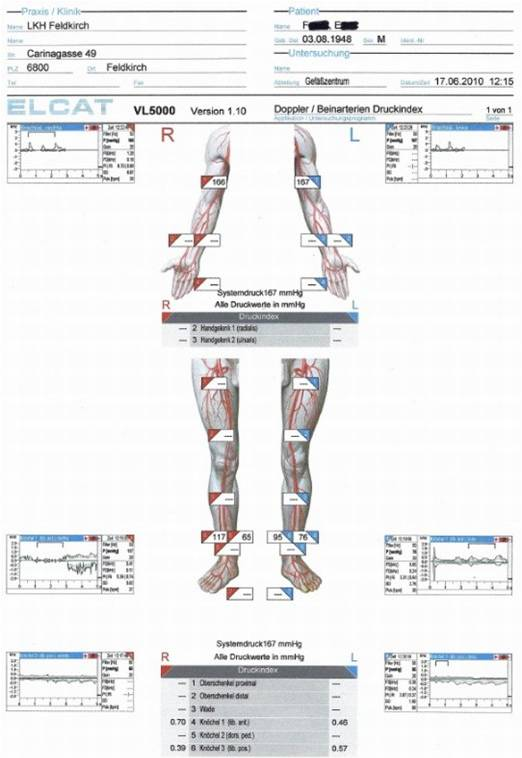
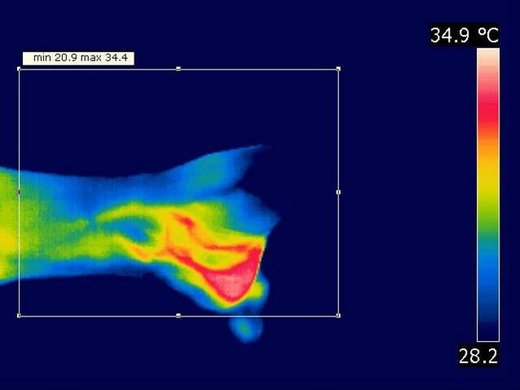
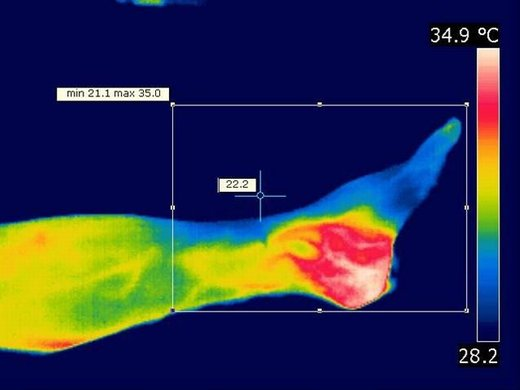
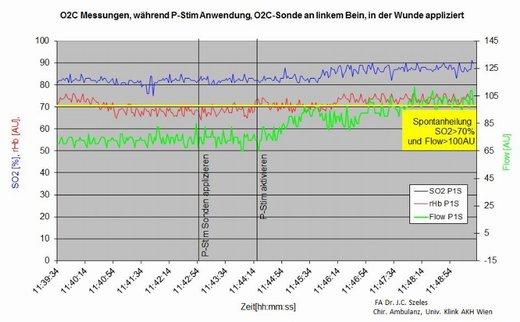
A new era in wound healing: stimulation of the Vagus nerve by the P-STIM™ device. Stimulation of the vagus nerve provides better blood circulation after 30 minutes of using the P-STIM™.
and 30 minutes after stimulation with P-STIM™.
of the leg: before stimulation and 30 minutes
after stimulation with P-STIM™.
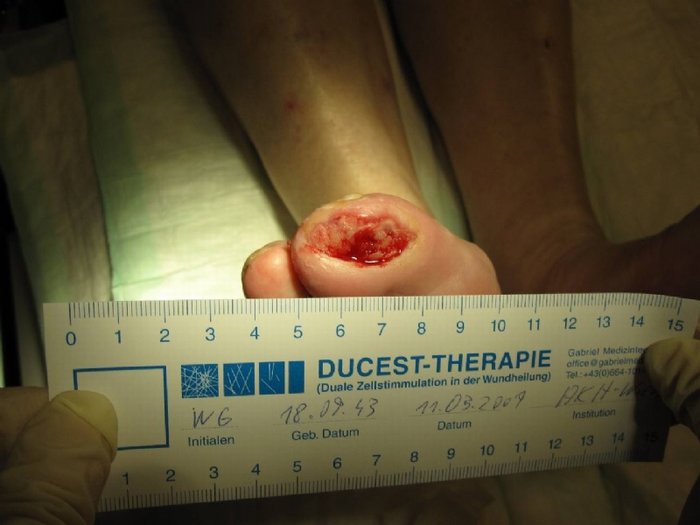
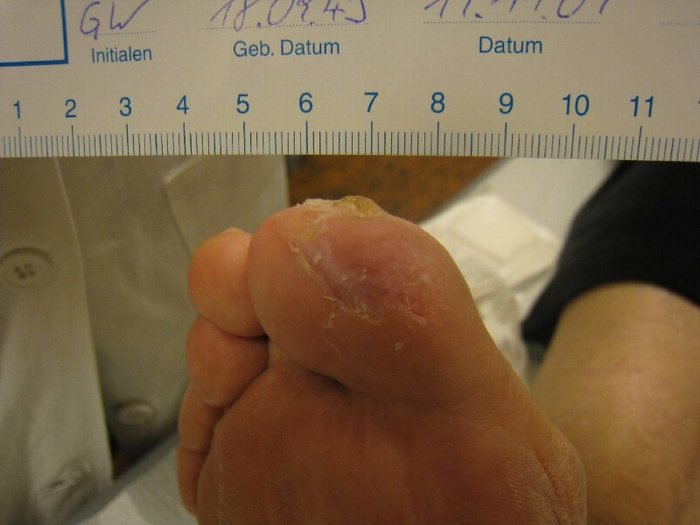
PAD: before stimulation and 30 minutes
after stimulation with P-STIM™.
PAD: before stimulation and 30 minutes
after stimulation with P-STIM™.
Pain Treatment
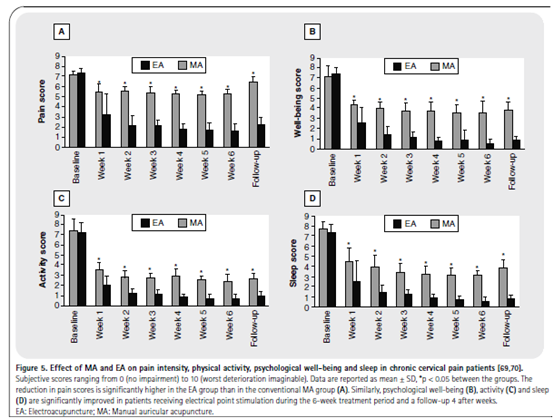
The P-STIM™is a portable auricular electroacupuncture stimulation device used for the treatment of pain. Compared to conventional acupuncture, it has the advantage of continuous auricular stimulation for up to 4 days.
Clinical studies in outpatients have investigated the P-STIM™in chronic musculoskeletal pain and its use for minor surgery. In chronic cervical or low back pain, auricular electroacupuncture was more effective than conventional auricular acupuncture. The results in acute pain were controversial. Auricular electroacupuncture reduced pain and remifentanil consumption during oocyte aspiration when compared with conventional auricular acupuncture or a sham treatment. (Sator-Katzenschlager SM, Michalek-Sauberer A. , “P-STIM™ auricular electroacupuncture stimulation device for pain relief.”)
Instructions for using P-STIM™
Items supplied:
- P-STIM™with inserted but not activated batteries (1)
- Cover of™(2)
- Cap for the MULTI-POINT locate-and-apply stylus
- Position plasters for marking the stimulation points (4)
- Sterile pack of needles (5)
- Fixation plasters to fasten the appliance leads
- Fixation plasters for P-STIM™appliance
- An alcohol swab
- This instruction manual
Application proccess
Application Tool
Step 1: Cleaning and disinfecting
It is essential to clean and disinfect the areas of skin and the tip of the MULTI-POINT locate-and-apply stylus thoroughly in order to avoid risk of infection.
Using the alcohol swab, first clean the surface of the ear chosen for stimulation and then the skin behind the ear where the P-STIM™will be fixed later. The cleaned area of the skin has to be absolutely dry prior to application.
Dip the metal tip of the MULTI-POINT locate-and-apply stylus in a disinfecting solution.
Step 2: Placing a new cap on the MULTI-POINT
Take the disposable cap out of the P-STIM™packaging and mount it on the MULTI-POINT without touching the cleaned metal tip with your hand.
For hygiene and technical reasons a new cap has to be used for each application. The cap can be mounted on and removed by positioning the mark on the cap over the middle of the red part of the stylus.
Twist the cap until it gently latches into the “locate” position. The push-actuator button on the MULTI-POINT is used to release the stimulation needles after they are applied.
The button serves no purpose in the “locate” function.
Step 3: Locating and marking the stimulation points
The MULTI-POINT locates stimulation points by taking measurements of the skin’s impedance, which are converted into visual and acoustic signals.
The stimulation points are marked to make it easier to apply the needles.
Pick up a position plaster from the packaging with the locating tip.
Lift the stylus, the position plaster is held by the tip of the stylus.
Place one hand on the patient while holding the MULTI-POINT in the other hand to the skin near the stimulation point you want to localize. This creates the closed circuit necessary for taking measurements.
Slowly scan the area of the skin, making sure that the tip of the locating stylus is always at right angles to the skin and that the pressure applied is kept as constant as possible.
To locate stimulation points, move the stylus in the direction of the acoustic signal as it gets louder and as the light displays gets brighter. Take care to choose only points where the signals emitted by the MULTI-POINT are similar.
If the points selected differ greatly in their properties (impedance, resistance), stimulation will be irregular and lack an optimum effect.
Once the stimulation point is located, press the stylus gently against the surface of the skin until the position plaster sticks in place, marking the required position.
Do not touch the marked point with your hand. The point where the needle is to be applied must be free of contamination.
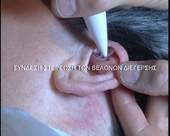
Step 4: Fixing the stimulation needles
Remove the protective film from the sterile pack of needles. Inside are 3 stimulation needles with integrated plasters.
Take the MULTI-POINT and twist the cap until it gently latches into the “apply” position.
Lower the stylus with a little pressure onto a needle from the pack until the cap fully encloses the needle head. Lift the stylus-the needle will be held by the cap.
Apply the needle to the center of a marked stimulation point. Only then are you to actuate the release button on the stylus in order to free the needle from the cap. The plaster integrated in the needle has to sit closely on the skin to guarantee good fixation. If necessary, press on and smooth out this plaster to strengthen its hold.
Repeat the procedure for the other two stimulation points.
Step 5: Activating the P-STIM™
Take the P-STIM™out of the package, peel off the battery foils (1) and slide the cover (2) on the appliance.
The cover will snap into place only if the recess on the cover is at the lead end (conductor end).
Removing and reinserting the batteries or wrongly pressing on the cover may cause damage and render the appliance useless.
Step 6: Applying the P-STIM™
Peel off the protective film from the earth electrode on the rear of the P-STIM™ and place the appliance behind the ear.
The serial number printed on the film is important for documentation purposes and has to be kept for the course of treatment.
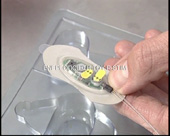
Pick up one of the contact rings with the ring applicator and press it onto a stimulation needle as shown in the picture.
Take care to keep the contact ring as straight as possible when pressing it onto the stimulation needle.
Connect the contact rings to the needles for the other two stimulation points.
Step 7: Additional Fixation
It is recommended that the patient turns the head sideways when P-STIM™ is fastened. Good fixation is then combined with sufficient freedom of movement.
Put the small oval fixation plasters over the needles with the fitted contact rings.
Place the two large plasters over the electrode as a means of additional fixation.
P-STIM™ Results Photo Gallery